SQLServer 2017 Linux版の環境を構築してみた
クラウド環境でSQLserverを動作させるための検証の一環として、SQLServer 2017 Linux版の環境を構築してみた
設定メモ
Ubuntu Serverのインストールイメージをダウンロードする
Ubuntu Server 18.04 LTSではSQLServer 2017 Linux版は動作しないので注意
SQLServer 2017 Linux版の動作するUbuntu Server 16.04 LTSをダウンロードした
ubuntu-16.04.4-server-amd64.iso 2018-03-01 03:36 848M
Ubuntu Serverのインストール用のUSBを作成する
インストール用のUSBの作成はMacOSXで行った
$ diskutil list
/dev/disk4 (external, physical):
   #:                       TYPE NAME                    SIZE       IDENTIFIER
   0:     FDisk_partition_scheme                        *31.6 GB    disk4
   1:             Windows_FAT_32 ESD-USB                 31.6 GB    disk4s1

$ diskutil unmountDisk /dev/disk4

$ sudo dd if=/Users/user/Downloads/ubuntu-16.04.4-server-amd64.iso of=/dev/rdisk4 bs=1m
Ubuntu Serverをインストールする
インストーラに従ってUbuntu Serverをインストールした
今回は
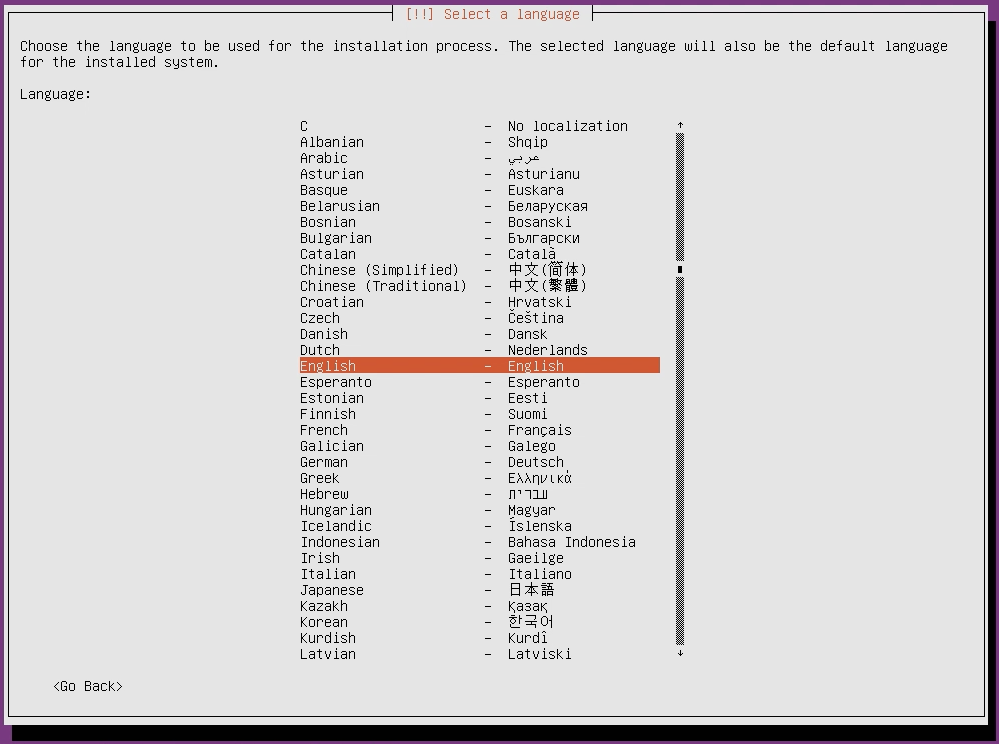
- インストール言語を「英語」
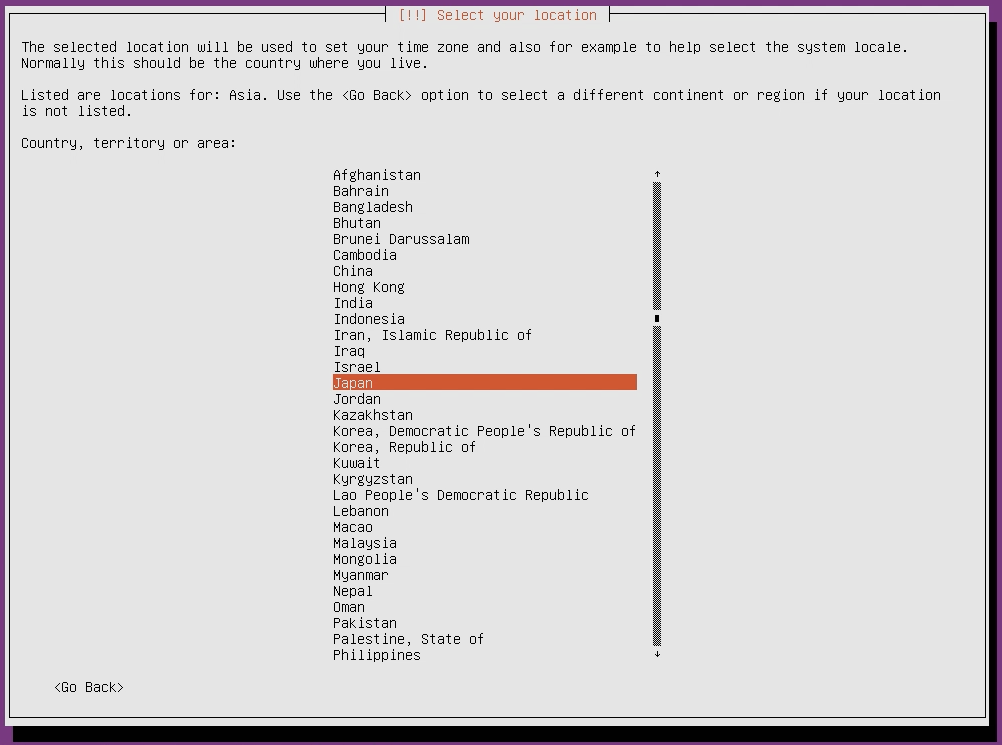
- 場所は「日本」
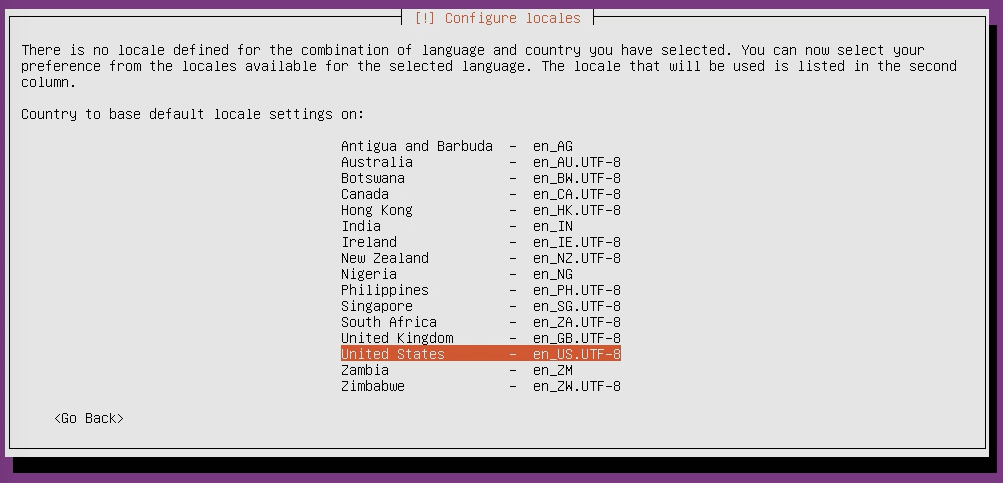
- ロケールは「United States - en_US.UTF-8」
- Software selectionで「OpenSSH server」を追加しておく

とした
Ubuntu Serverのインストールが済んだら
インストールされてるパッケージを更新しておく
$ sudo apt update
$ sudo apt -y upgrade
$ sudo apt -y autoremove
必要なものをインストールする
$ sudo apt -y install avahi-daemon
これ以降ssh user@ホスト名.localでアクセスできるようになる
SQLServer 2017 Linux版をインストールする
GPGキーをインポートする
$ wget -qO- https://packages.microsoft.com/keys/microsoft.asc | sudo apt-key add -
リポジトリを登録する
$ sudo add-apt-repository "$(wget -qO- https://packages.microsoft.com/config/ubuntu/16.04/mssql-server-2017.list)"
「add-apt-repository: command not found」というエラーが発生したときは?
$ sudo apt -y install apt-file
$ sudo apt-file update
$ sudo apt -y install software-properties-common
インストールする
$ sudo apt update
$ sudo apt -y upgrade
$ sudo apt -y install mssql-server
インストールできたら環境設定を行う
今回はExpressエディションとしてインストールする
$ sudo /opt/mssql/bin/mssql-conf setup
Choose an edition of SQL Server:
  1) Evaluation (free, no production use rights, 180-day limit)
  2) Developer (free, no production use rights)
  3) Express (free)
  4) Web (PAID)
  5) Standard (PAID)
  6) Enterprise (PAID)
  7) Enterprise Core (PAID)
  8) I bought a license through a retail sales channel and have a product key to enter.

Details about editions can be found at
https://go.microsoft.com/fwlink/?LinkId=852748&clcid=0x409

Use of PAID editions of this software requires separate licensing through a
Microsoft Volume Licensing program.
By choosing a PAID edition, you are verifying that you have the appropriate
number of licenses in place to install and run this software.

Enter your edition(1-8): 3
The license terms for this product can be found in
/usr/share/doc/mssql-server or downloaded from:
https://go.microsoft.com/fwlink/?LinkId=855862&clcid=0x409

The privacy statement can be viewed at:
https://go.microsoft.com/fwlink/?LinkId=853010&clcid=0x409

Do you accept the license terms? [Yes/No]:Y

Enter the SQL Server system administrator password:
Confirm the SQL Server system administrator password:
Configuring SQL Server...

The licensing PID was successfully processed. The new edition is [Express Edition].
ForceFlush is enabled for this instance.
ForceFlush feature is enabled for log durability.
Created symlink from /etc/systemd/system/multi-user.target.wants/mssql-server.service to /lib/systemd/system/mssql-server.service.
Setup has completed successfully. SQL Server is now starting.
サーバーの照合順序を変更する
Ubuntu Serverのロケールを「United States - en_US.UTF-8」 にしていたので、サーバーの照合順序が「SQL_Latin1_General_CP1_CI_AS」になっていた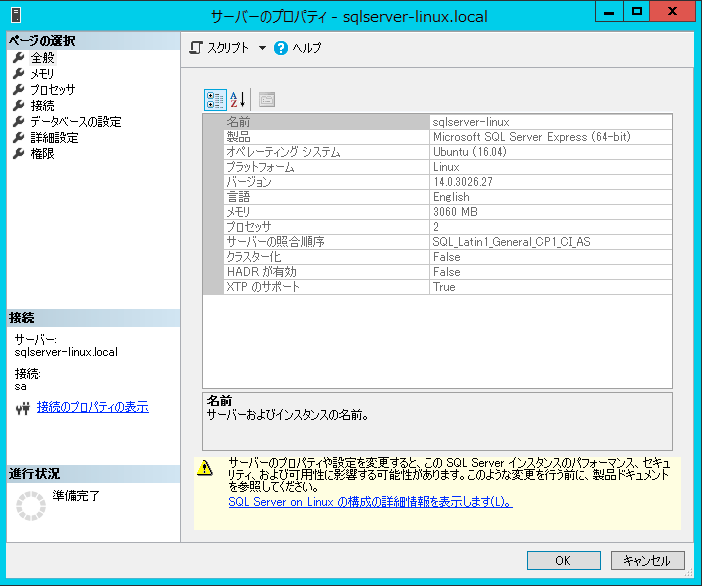
これを「Japanese_CI_AS」に変更しておく
$ sudo systemctl stop mssql-server

$ sudo /opt/mssql/bin/mssql-conf set-collation
Enter the collation: Japanese_CI_AS
Configuring SQL Server...

$ sudo systemctl start mssql-server
「Japanese_CI_AS」になった
フィードバックを送信しない
$ sudo systemctl stop mssql-server

$ sudo /opt/mssql/bin/mssql-conf set telemetry.customerfeedback false

$ sudo systemctl start mssql-server
データベースのバックアップディレクトリを変更する
$ sudo systemctl stop mssql-server

$ sudo mkdir /DBBackup
$ sudo chown mssql /DBBackup
$ sudo chgrp mssql /DBBackup
$ sudo /opt/mssql/bin/mssql-conf set filelocation.defaultbackupdir /DBBackup

$ sudo systemctl start mssql-server
TCP接続の待受けポートを変更する
$ sudo /opt/mssql/bin/mssql-conf set network.tcpport [待受けするポート]

$ sudo systemctl restart mssql-server
Ubuntu Server側でバックアップできるようにする
とりあえずsqlcmdを使えるようにする
$ wget -qO- https://packages.microsoft.com/config/ubuntu/16.04/prod.list | sudo tee /etc/apt/sources.list.d/msprod.list
$ sudo apt update
$ sudo apt -y install mssql-tools
$ echo 'export PATH="$PATH:/opt/mssql-tools/bin"' >> ~/.bash_profile
$ echo 'export PATH="$PATH:/opt/mssql-tools/bin"' >> ~/.bashrc
$ source ~/.bashrc
これで
$ sqlcmd -H localhost -U sa -P password0! -Q "BACKUP DATABASE SQLDB01 TO DISK = N'SQLDB01.bak' WITH NOFORMAT, NOINIT, SKIP, NOREWIND, NOUNLOAD, STATS = 10"
を実行することでデータベースのバックアップが
$ sqlcmd -H localhost -U sa -P password0! -Q "BACKUP LOG SQLDB01 TO DISK = N'SQLDB01.log' WITH NOFORMAT, NOINIT, SKIP, NOREWIND, NOUNLOAD, STATS = 10"
を実行することでデータベースのトランザクションログがバックアップできる
cronで定期的に実行させる
$ crontab -e
# 営業時間中は1時間ごとにトランザクションログのバックアップを取得する
30 8-18 * * 1-6 /opt/mssql-tools/bin/qlcmd -H localhost -U sa -P password0! -Q "BACKUP LOG SQLDB01 TO DISK = N'SQLDB01.log' WITH NOFORMAT, NOINIT, SKIP, NOREWIND, NOUNLOAD, STATS = 10"
# 日曜日にフルバックアップを取得する
30 8 * * 0 /opt/mssql-tools/bin/sqlcmd -H localhost -U sa -P password0! -Q "BACKUP DATABASE SQLDB01 TO DISK = N'SQLDB01.bak' WITH NOFORMAT, NOINIT, SKIP, NOREWIND, NOUNLOAD, STATS = 10"
竹内電設は、大阪府下を中心に中小規模の組織がITシステムを効果的に活用するための、お手伝いをさせていただいております
© 2023 竹内電設; all rights reserved.